
I really love that I get to work with people who appreciate the beauty of well-made, high quality snow globes, and “behind the scenes” of my production line is a truly fascinating place to visit.
So I thought I’d take you on a step by step journey, showing how I help my clients design their dream snow globes.
Step 1 – The Research Phase
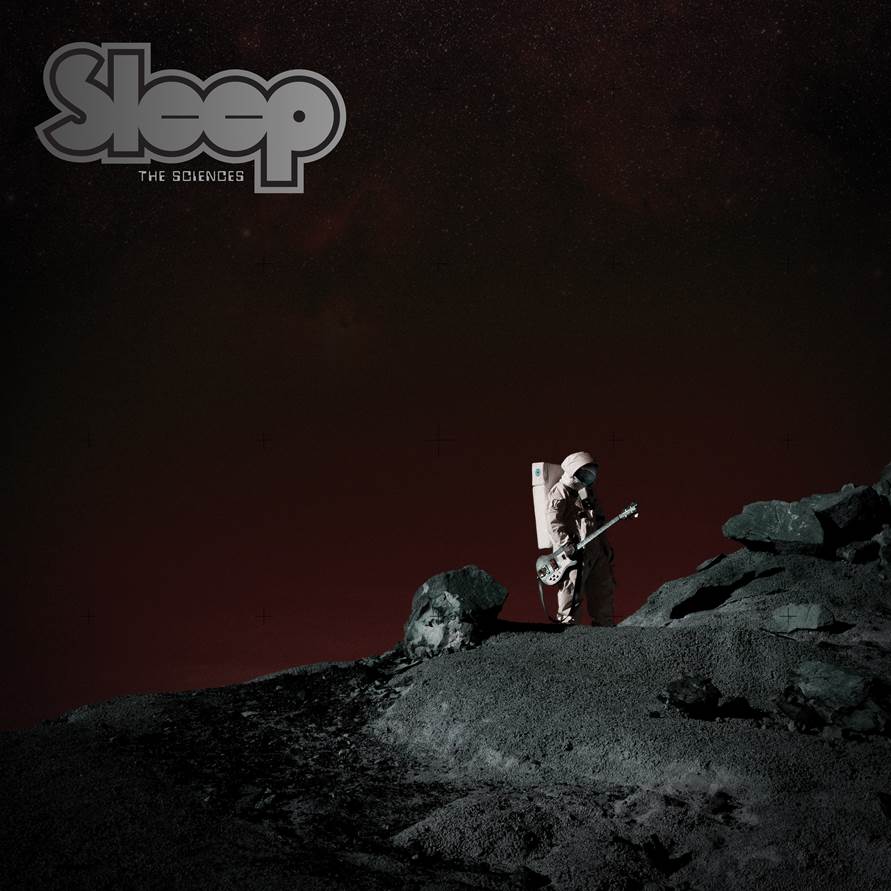
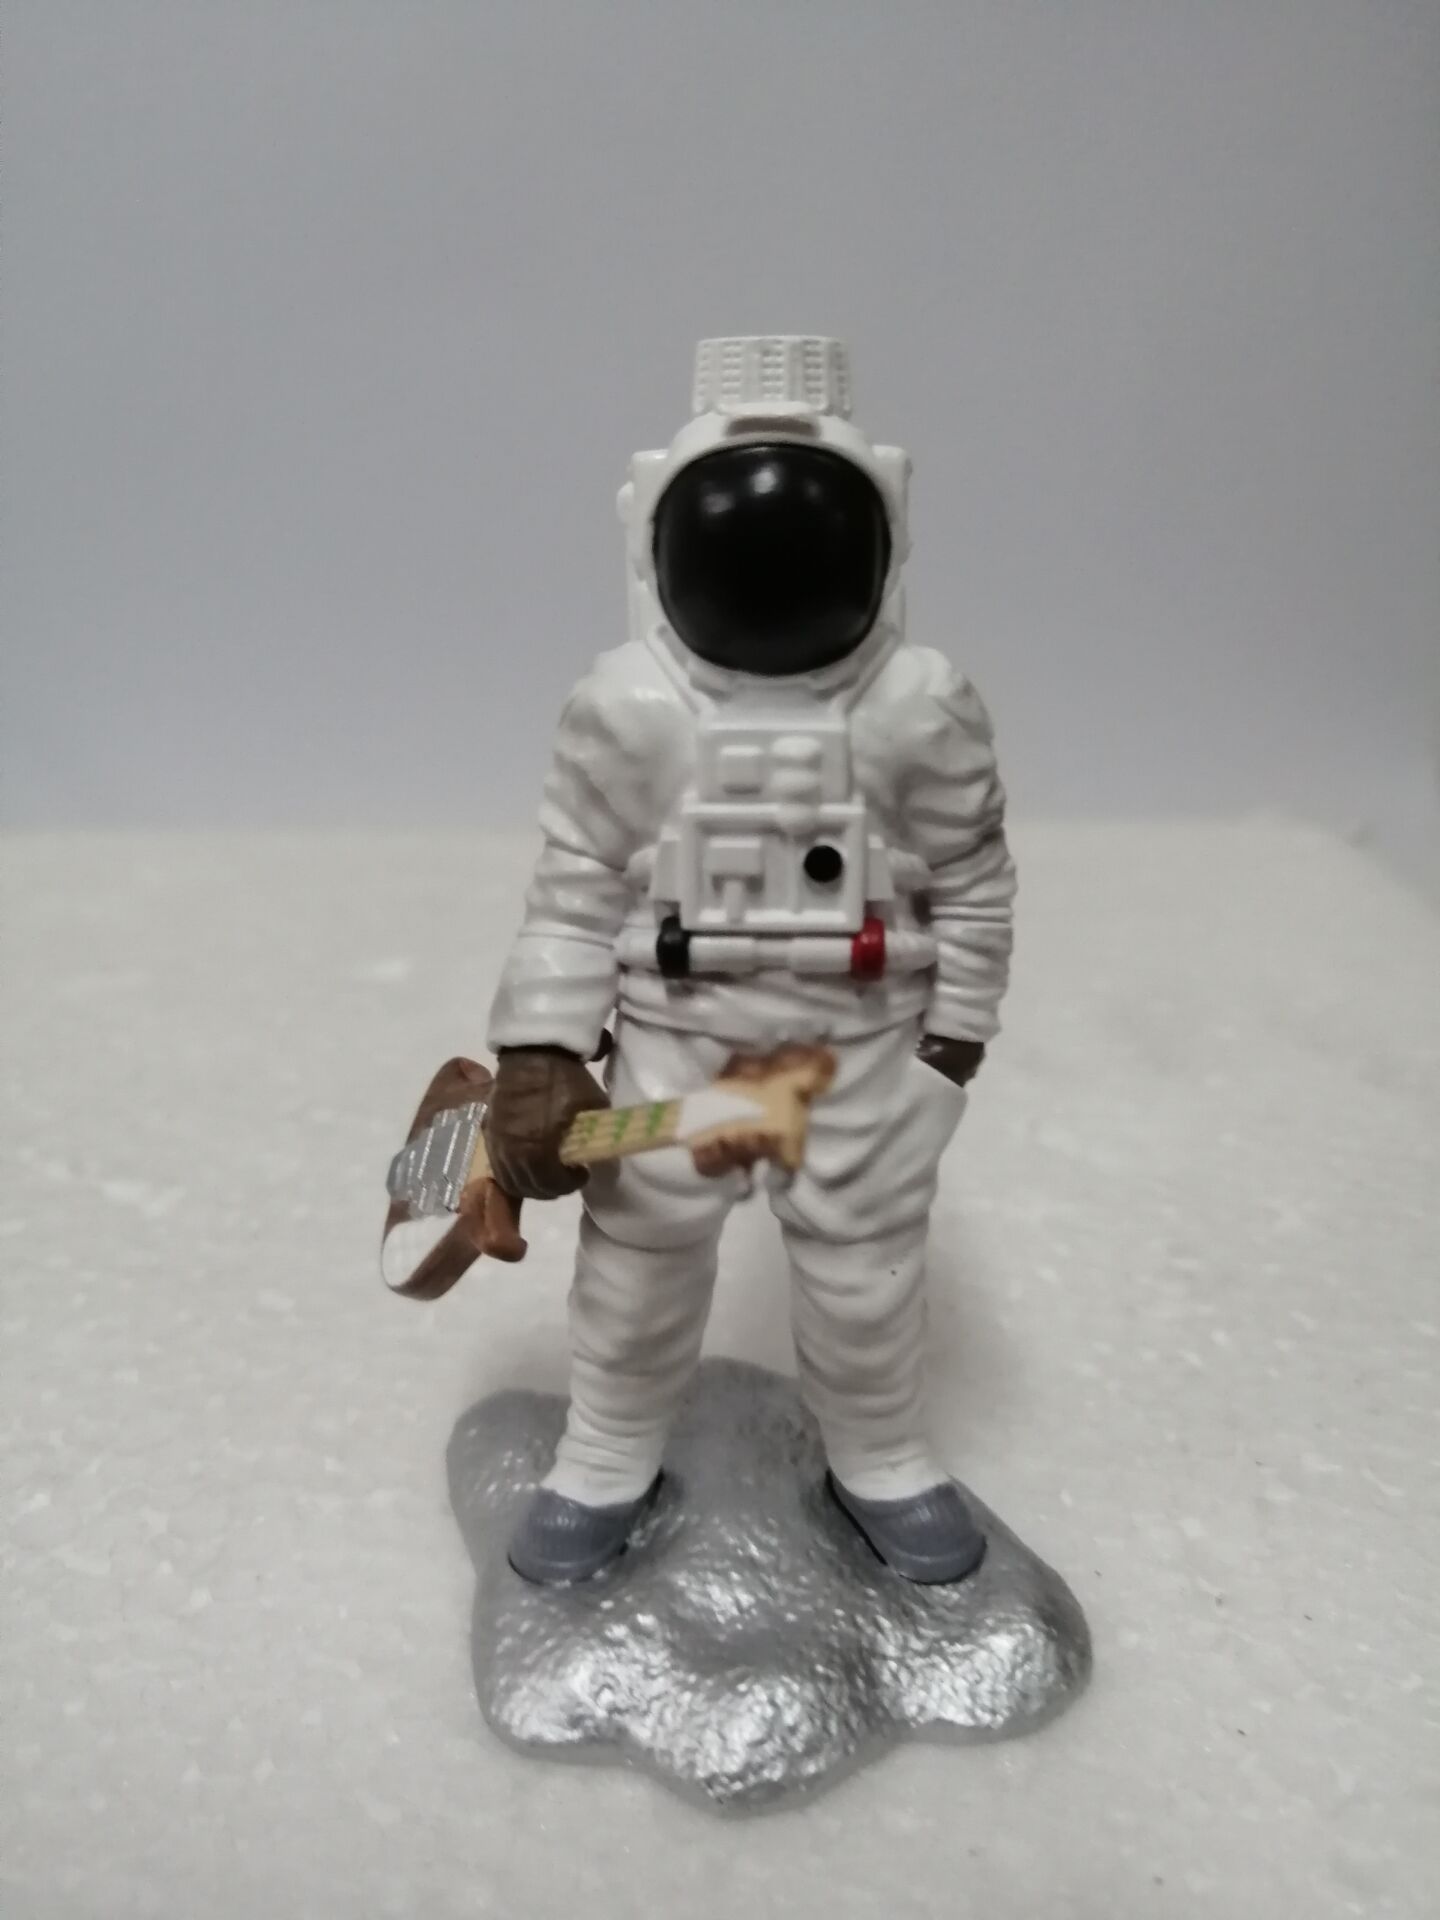
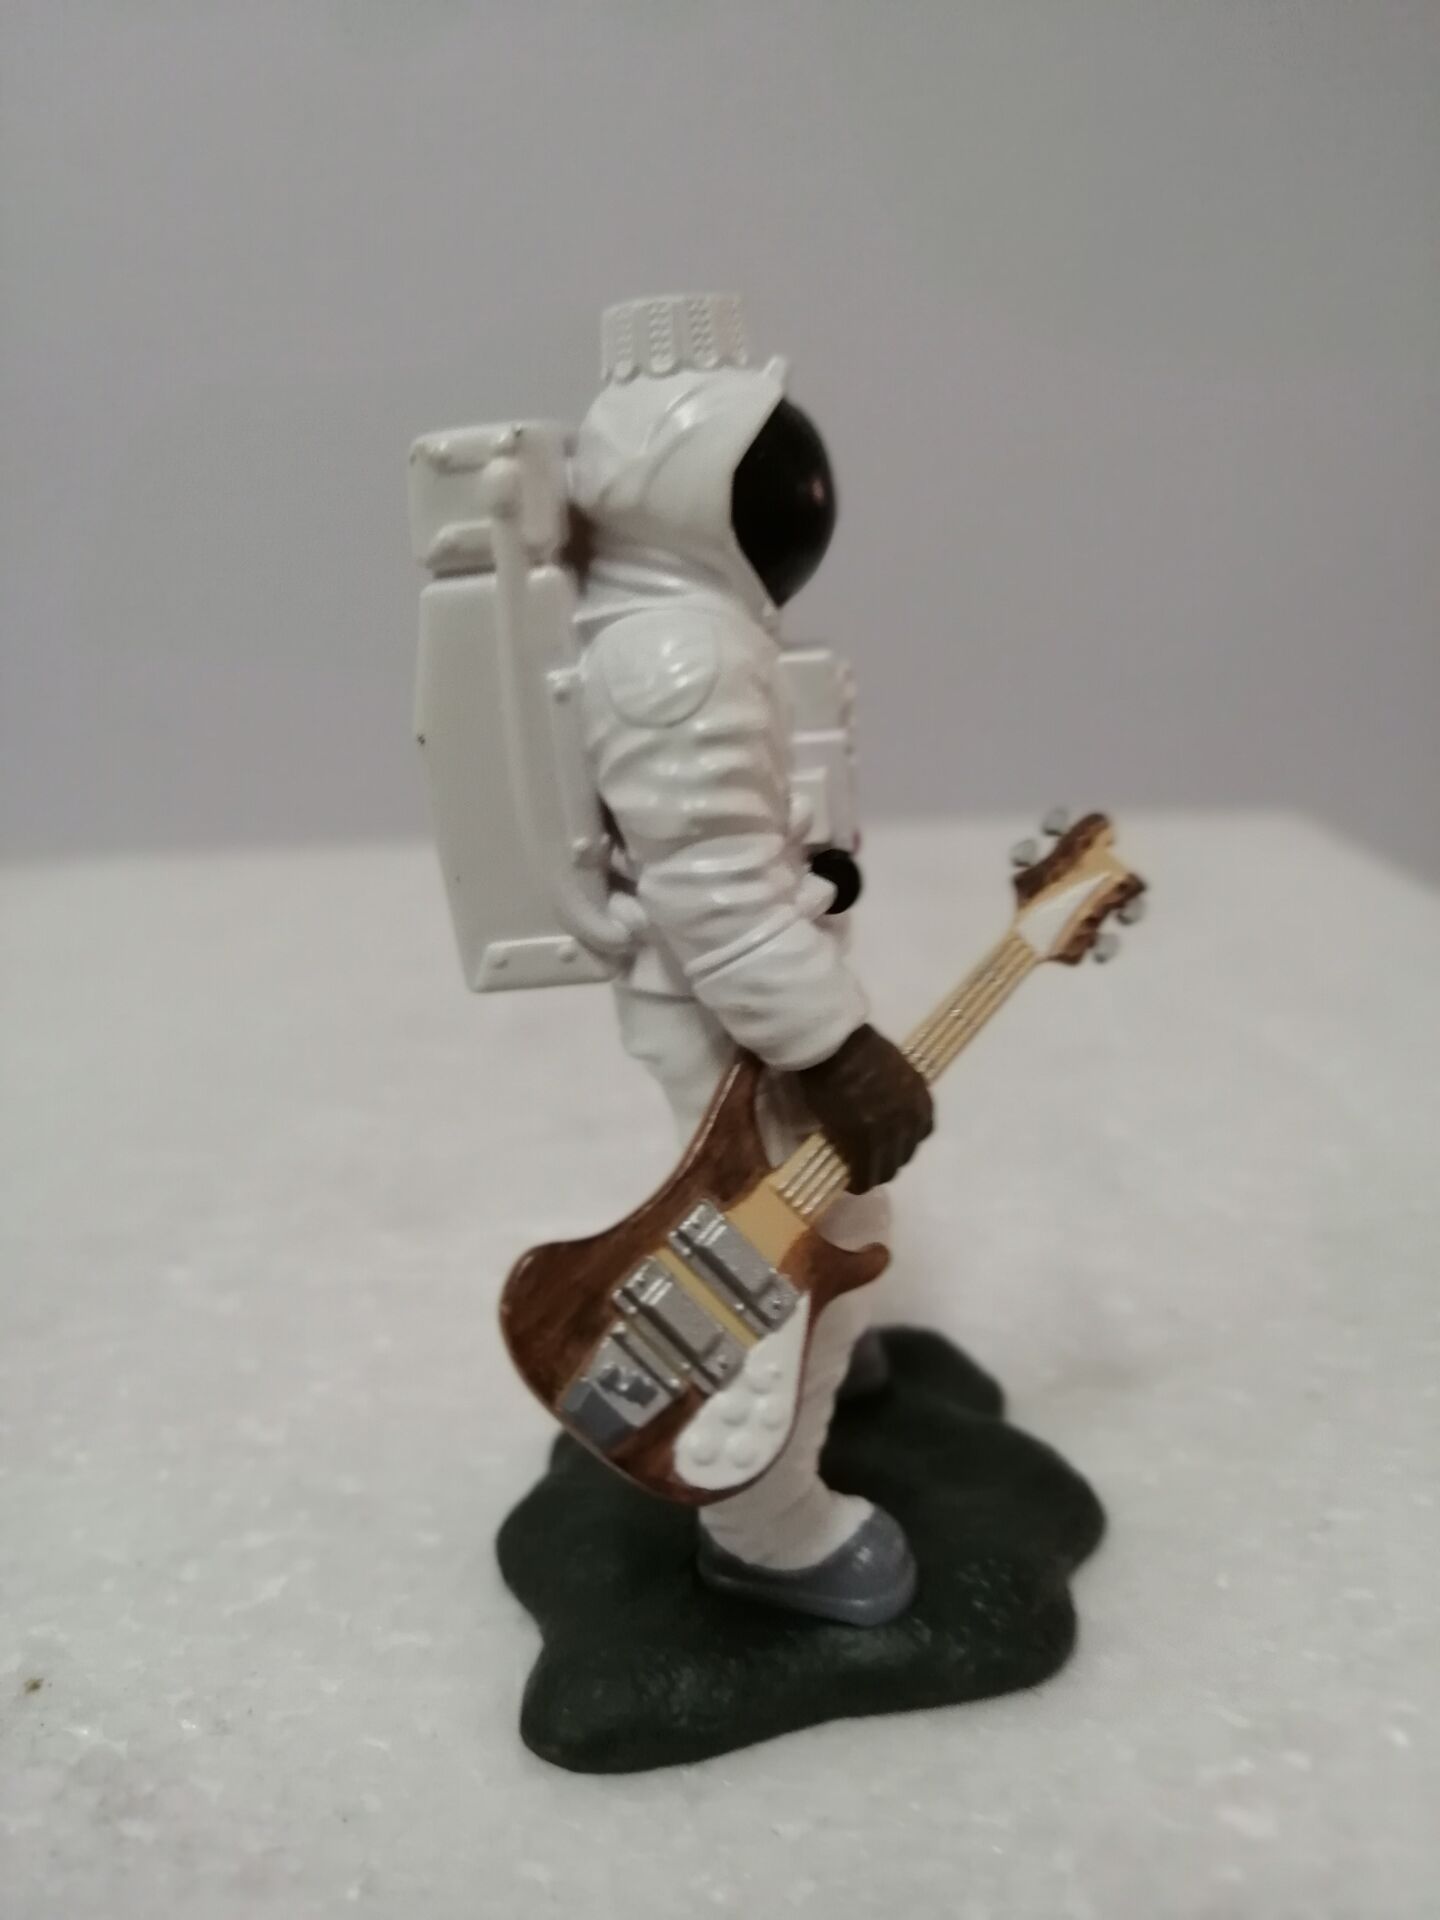
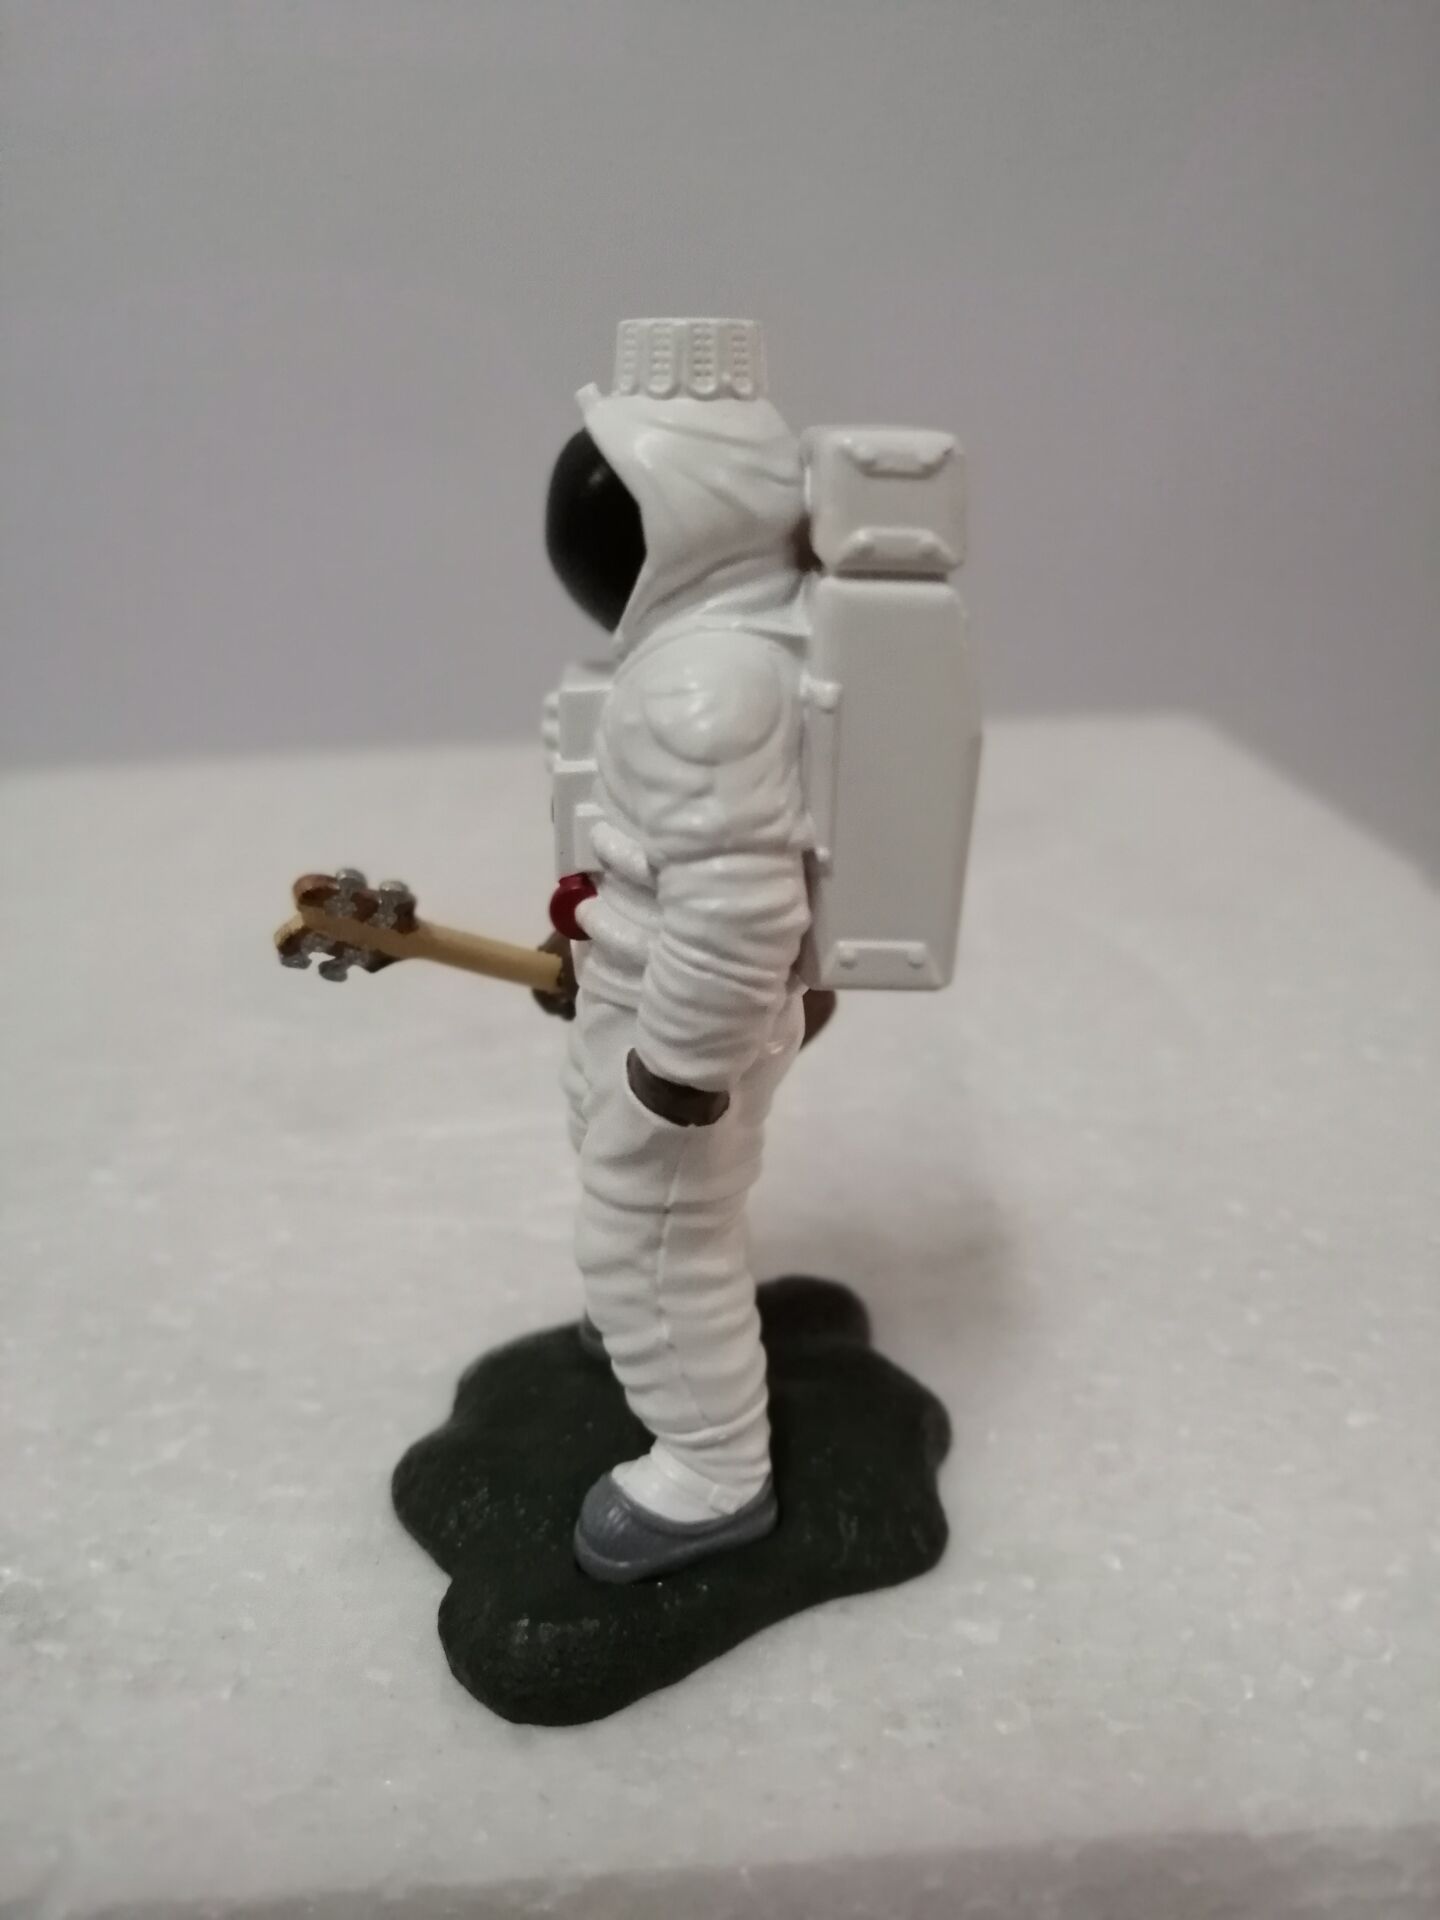
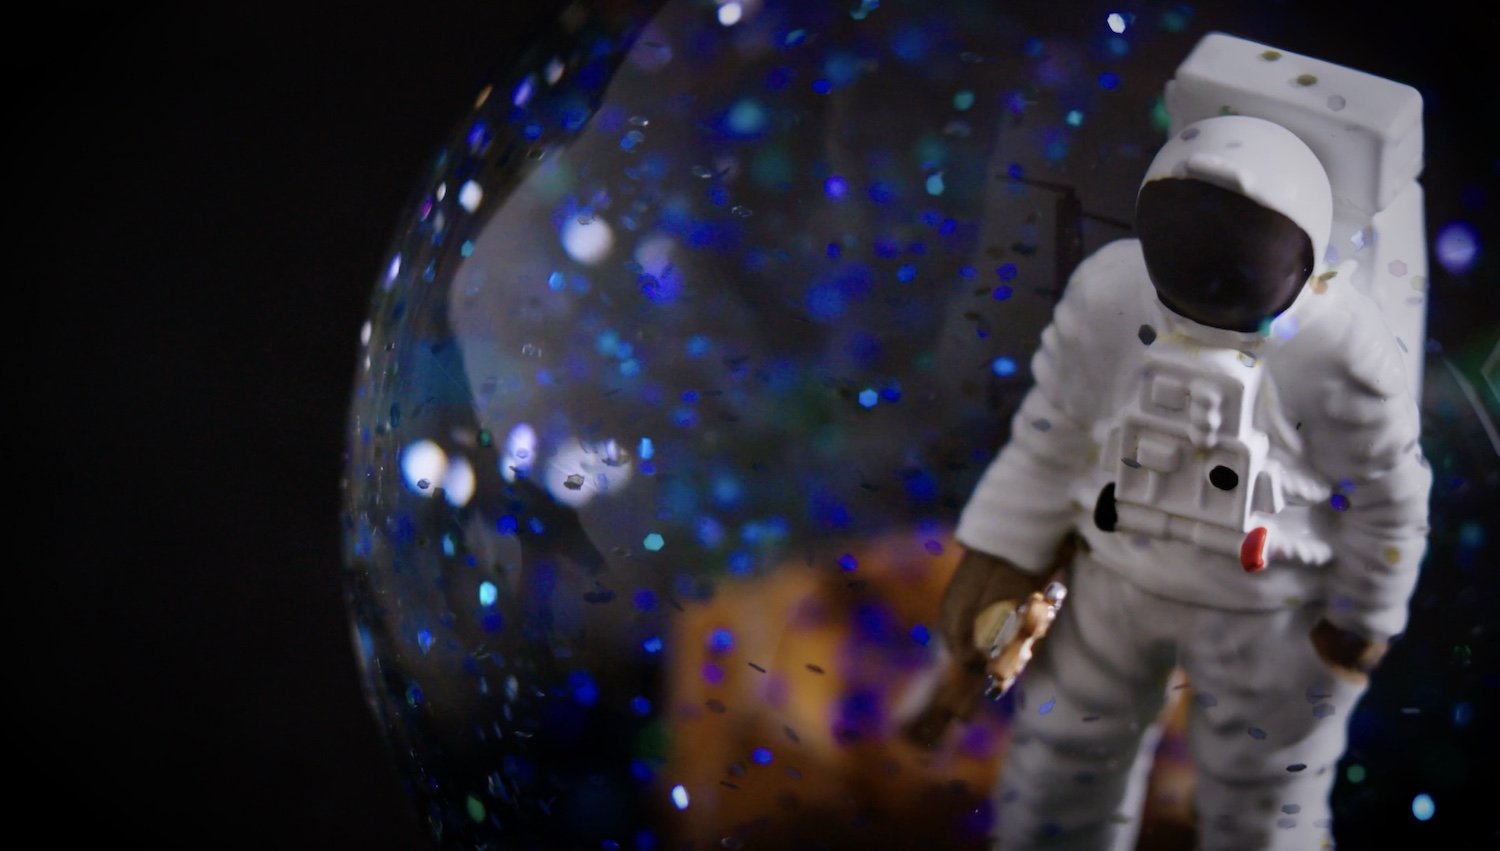
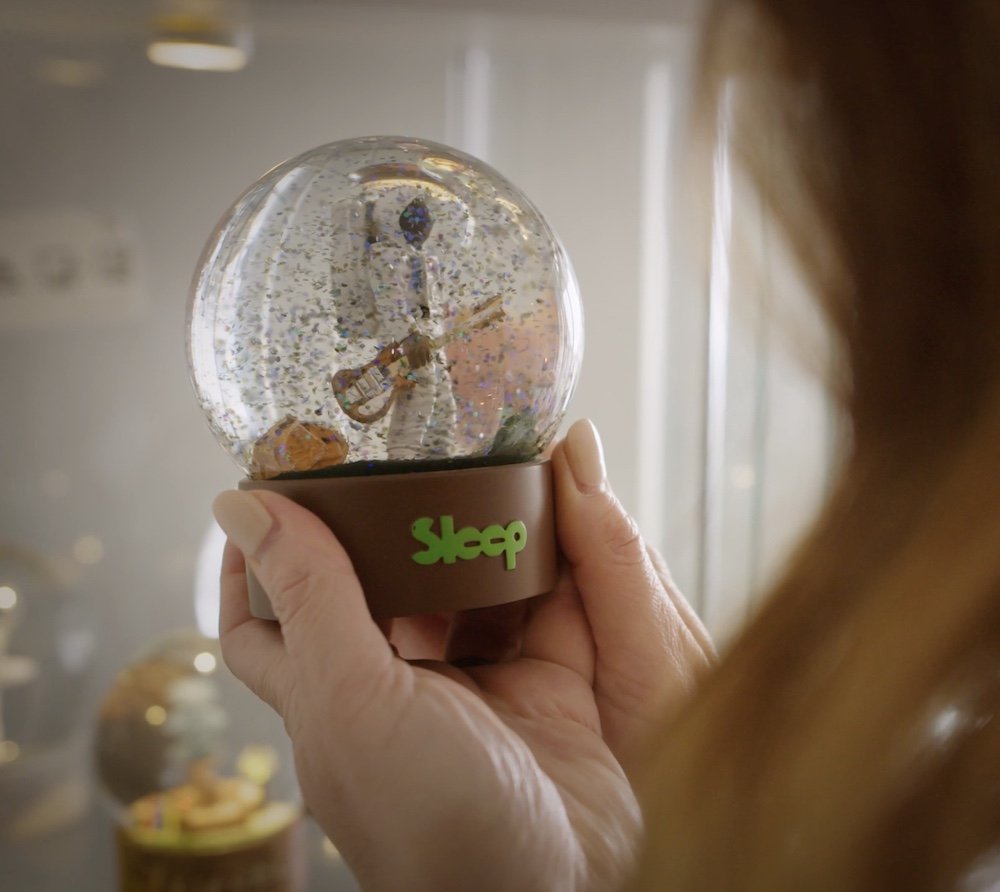
We always start out by referring to actual images of the item you want in your custom setting. If it’s a sculpture of an actual place or building, this research phase includes utilising Google Earth and Google Maps to see the roofline, which helps to give a clear “top down” view of the building structure. If it’s something more ephemeral, such as an album cover or 2D artwork, then we are working with much more of an artistic interpretation to create a 2D design and resulting 3D model. This project we completed for doom metal band “SLEEP” required us to replicate the album cover for the band’s album “The Sciences”, featuring a lone bass playing astronaut on the surface of the moon.
Step 2 – The Design Phase
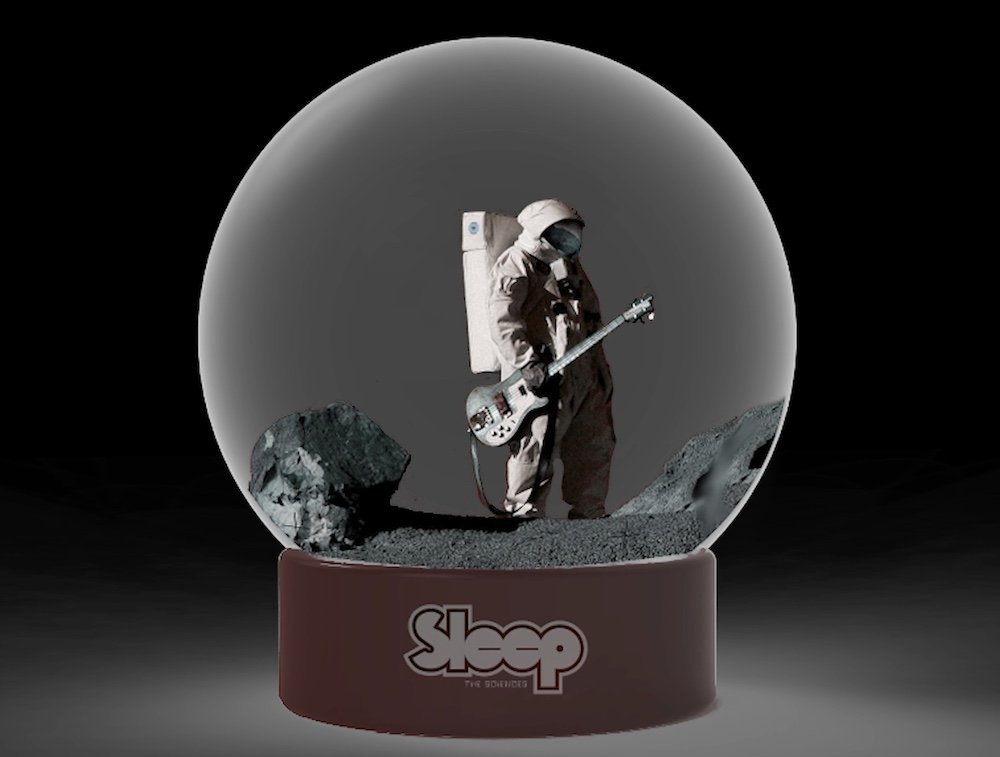
After the research phase, I create a 2D digital design for every client. That design is usually done prior to confirmation of the order, so that you feel 100% comfortable about the visual potential of the final product. As you can see here on the left, the digital design, although strictly 2D, does have a nice realistic feel to it, and allows us to confirm layout, colours, base shape and colour as well as logo placement. We work on this digital design with unlimited changes at zero cost and zero obligation until you’re completely satisfied that I can produce your own high quality snow globes faithfully. It’s only at that point that we confirm the order, and arrange a deposit payment.
Step 3 – The Sculpting/Model Production Phase
Once we’ve agreed on the digital design, it’s time to produce the model. Until about 2020, most of my projects were hand sculpted in clay, which was then moulded to produce the quantities ready for hand painting. With the proliferation of 3D modelling and printing, we have found ourselves with a second option, dependent on the design.
Snow globe engineering is quite complex and requires a delicate moulding process to produce the quantities. Sometimes this works best with hand sculpting, and sometimes it lends itself better to 3D design. And on some occasions, we even use a combination of the two!
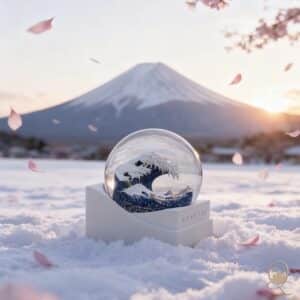
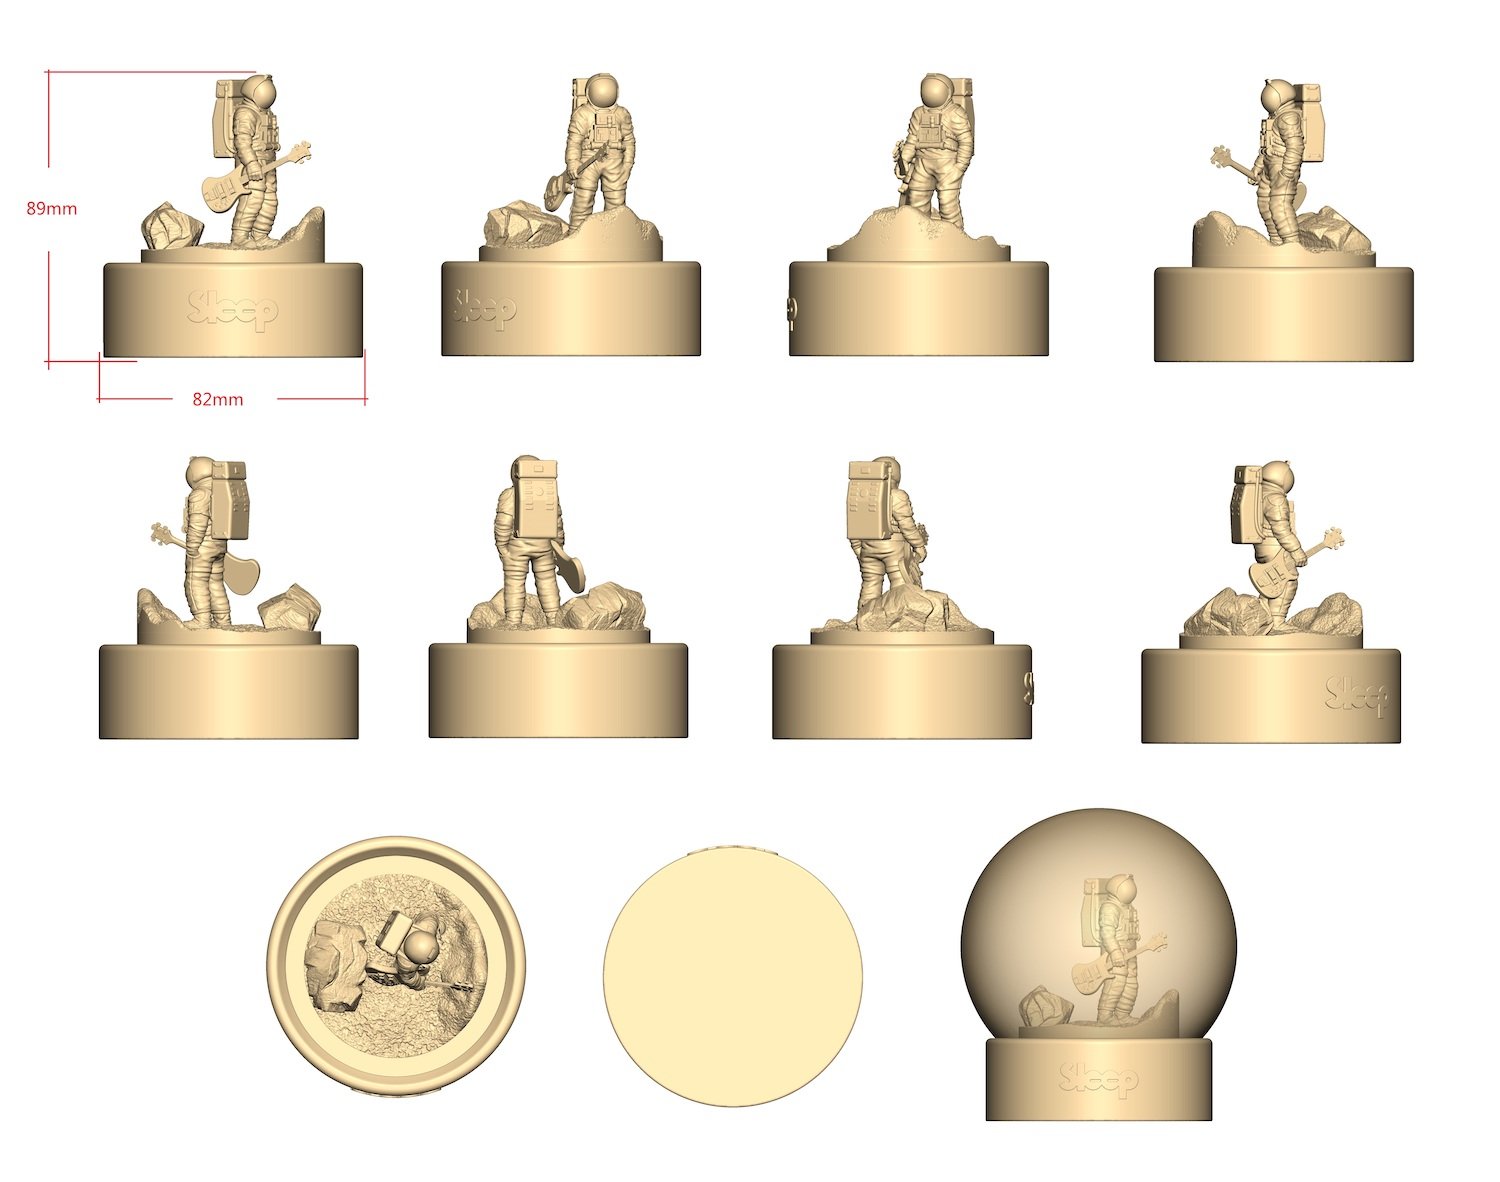
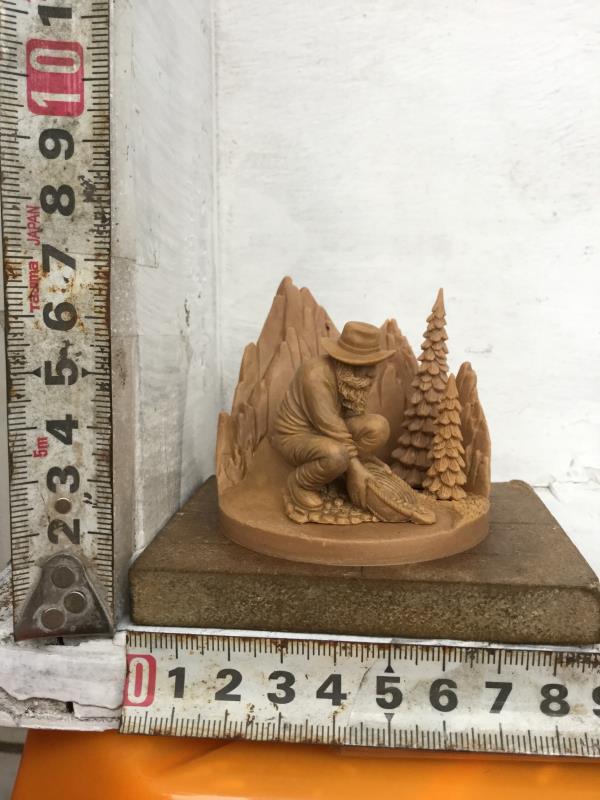
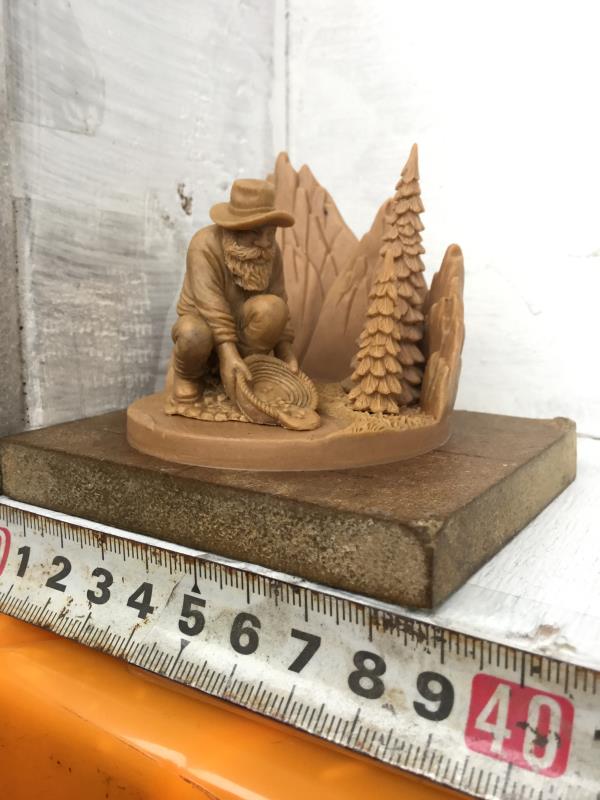
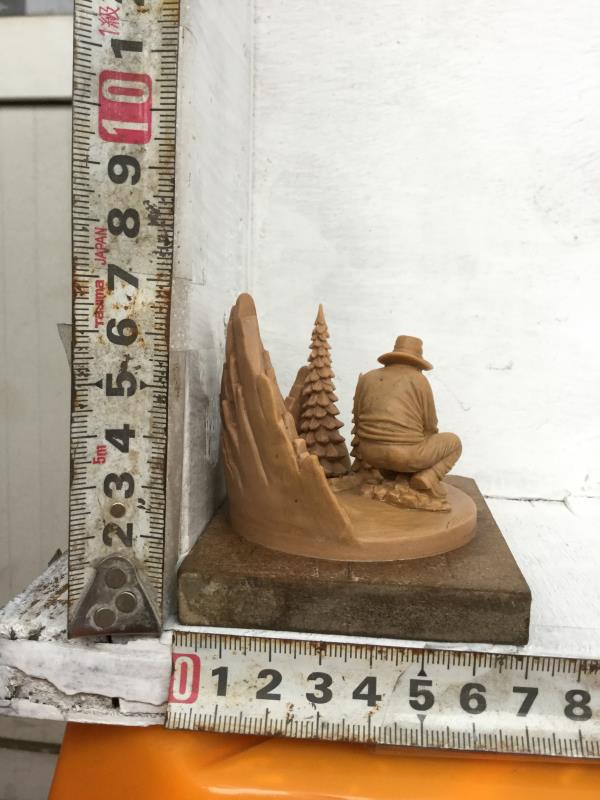
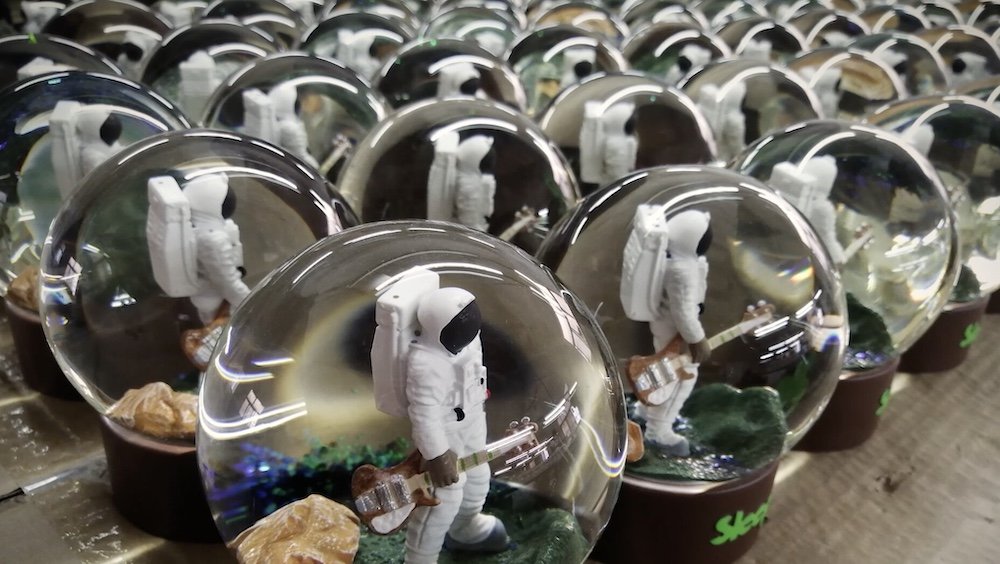
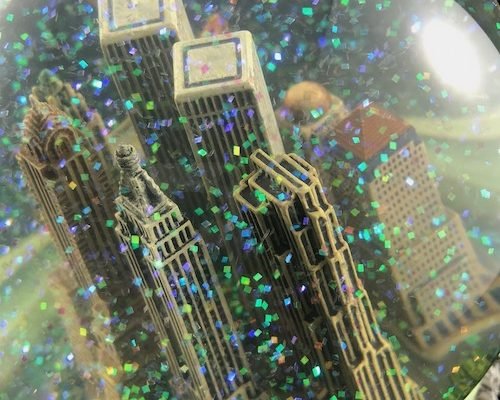
This first example is a project we produced using 3D modelling. The setting you see here is recreated on an area of just 5cm in diameter.
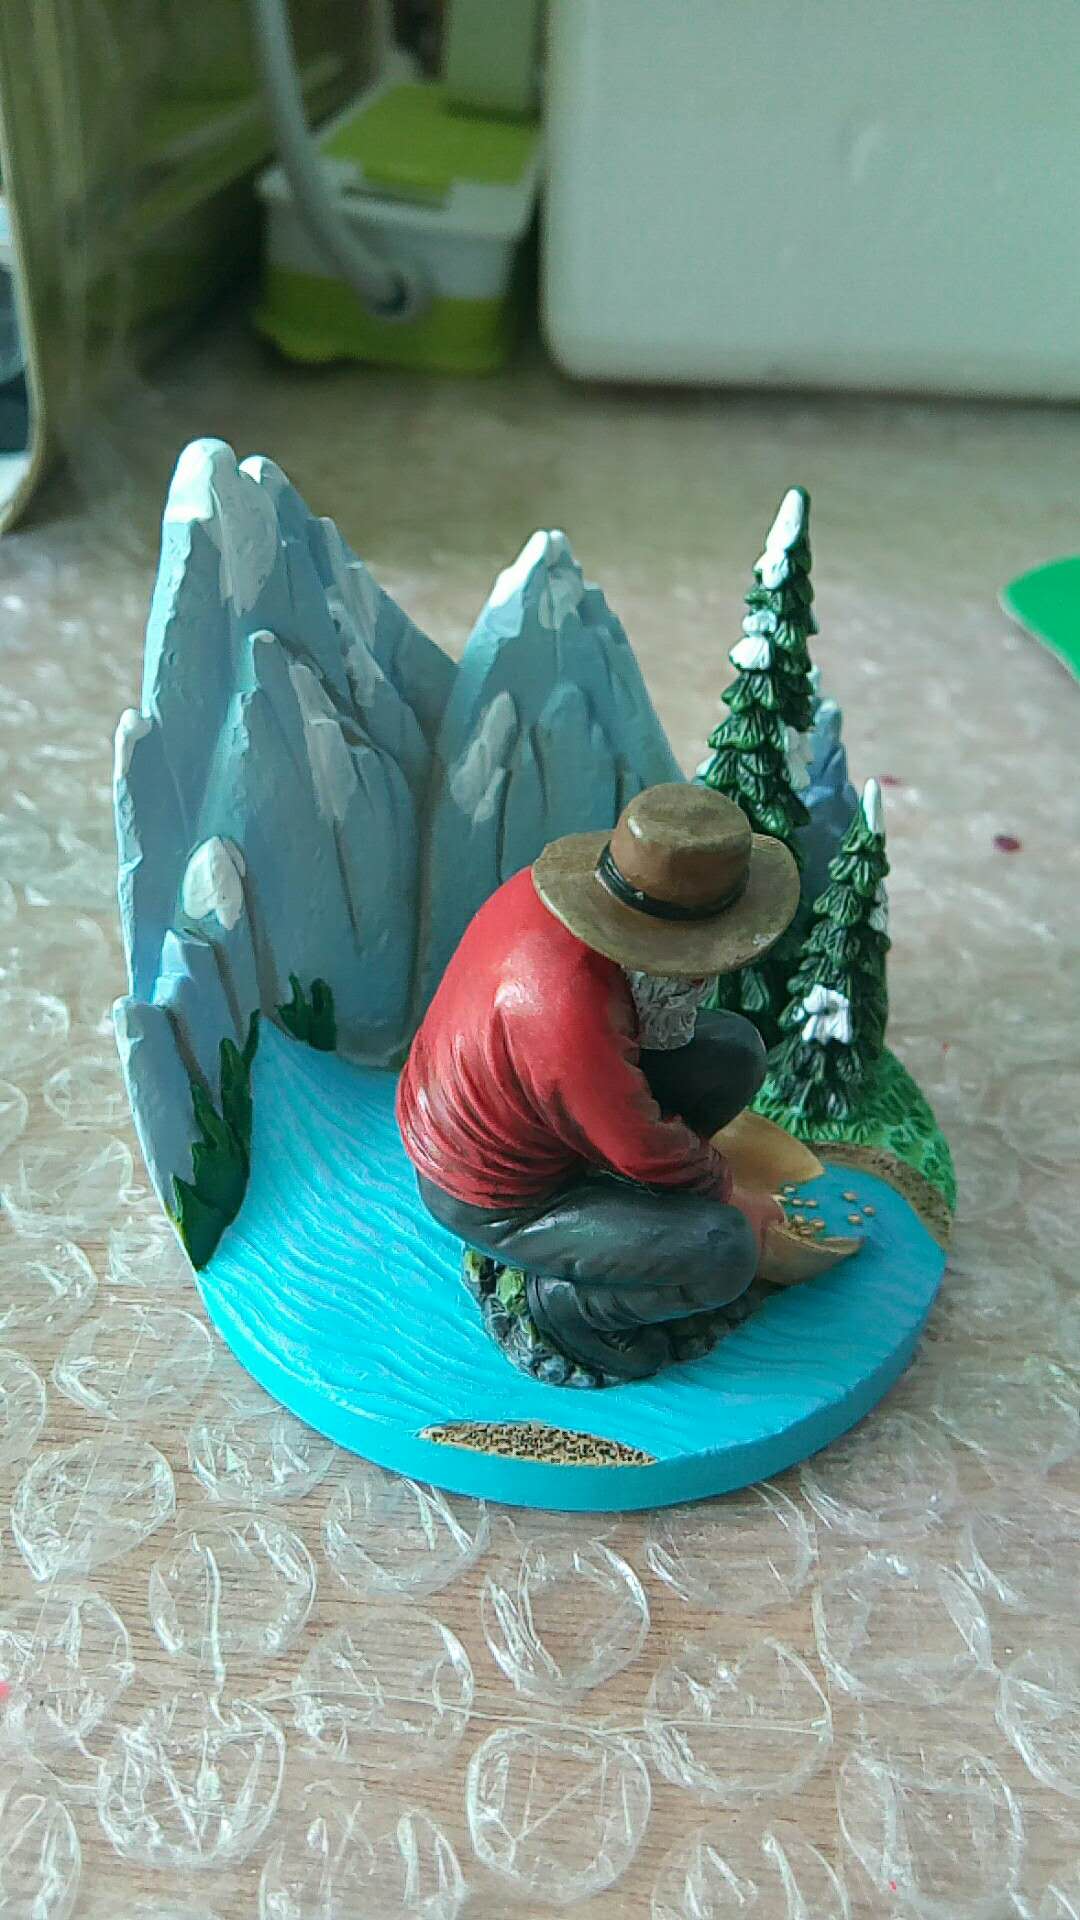
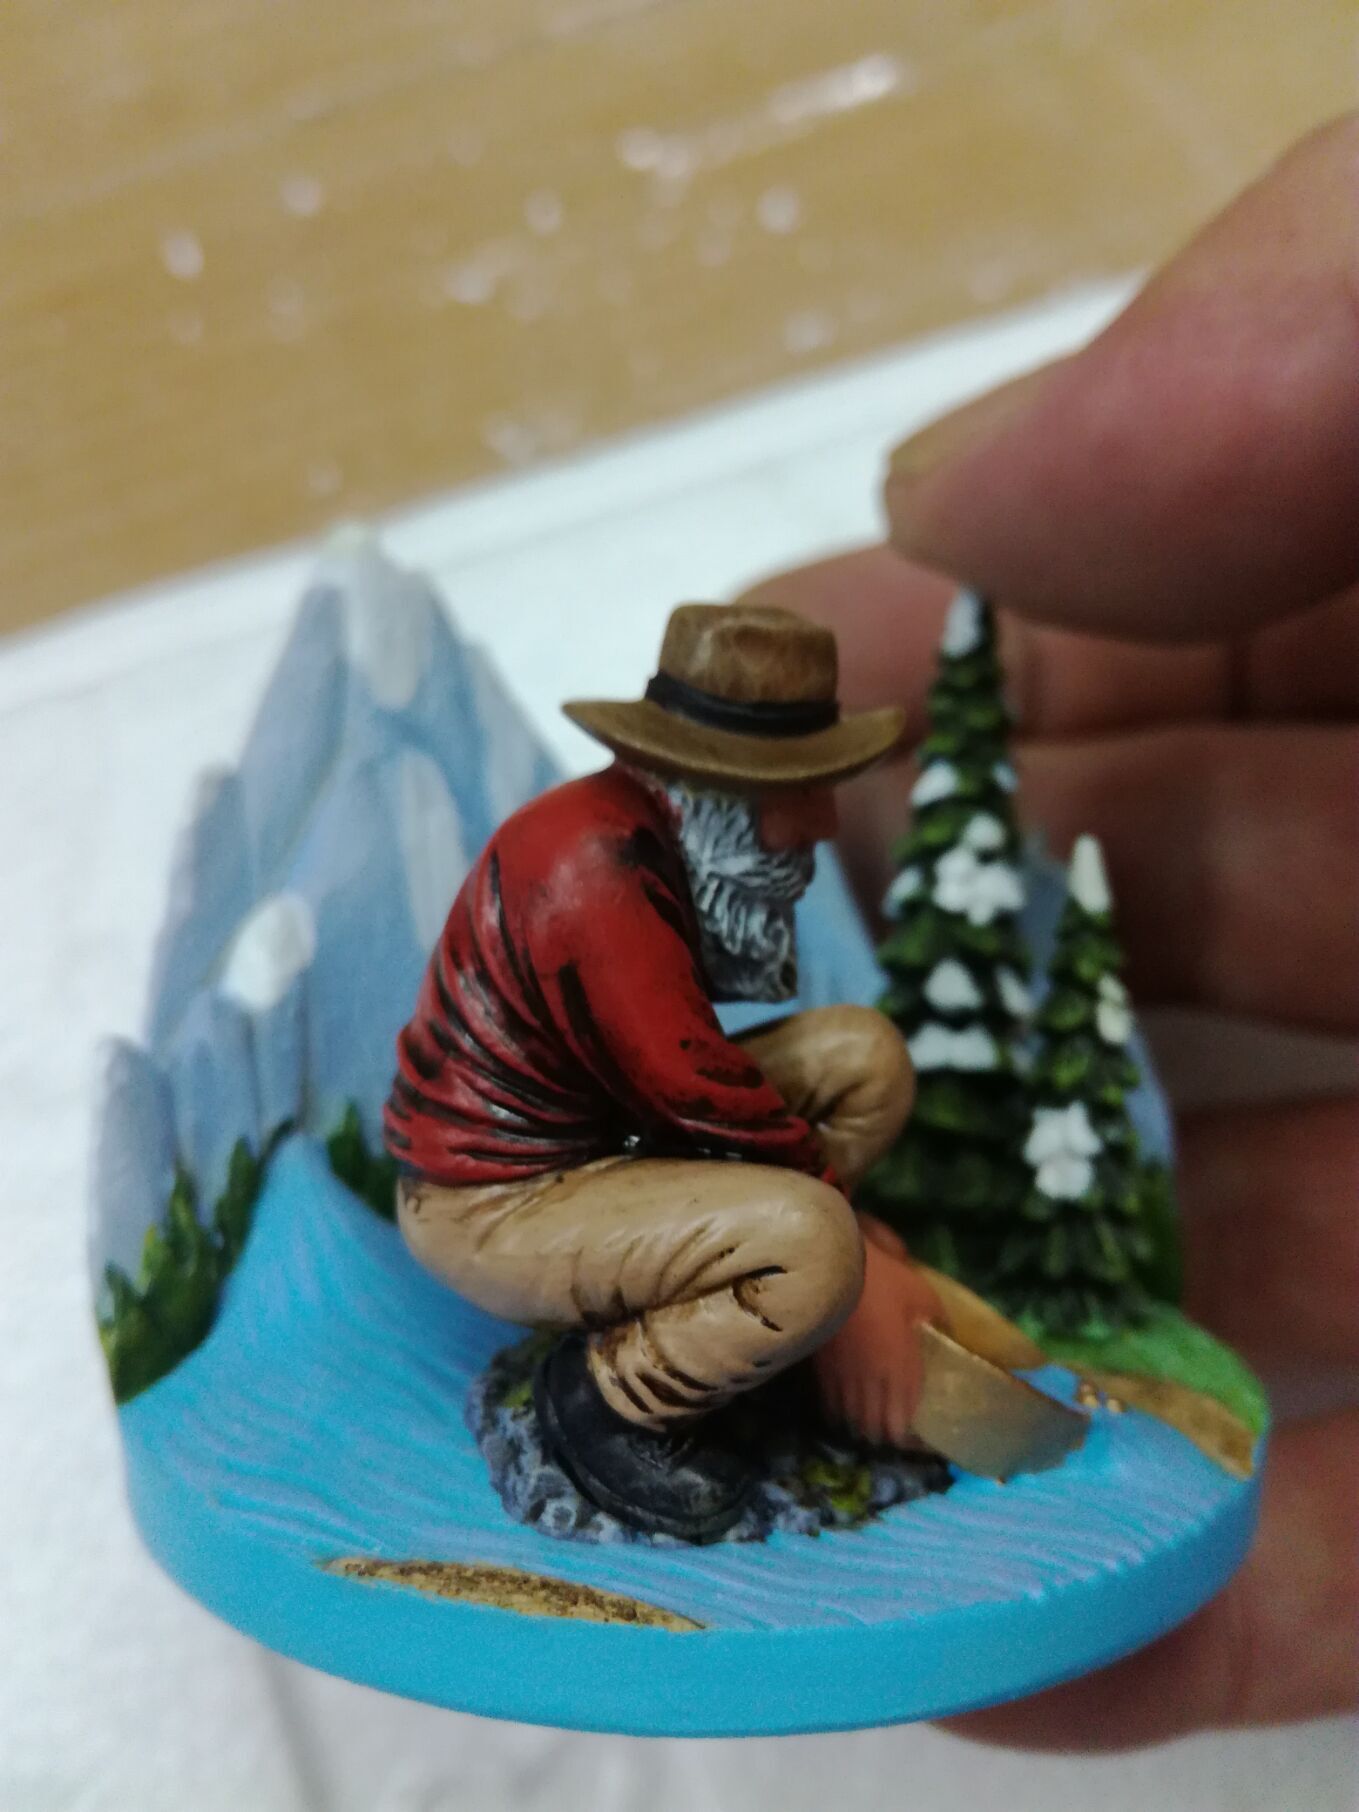
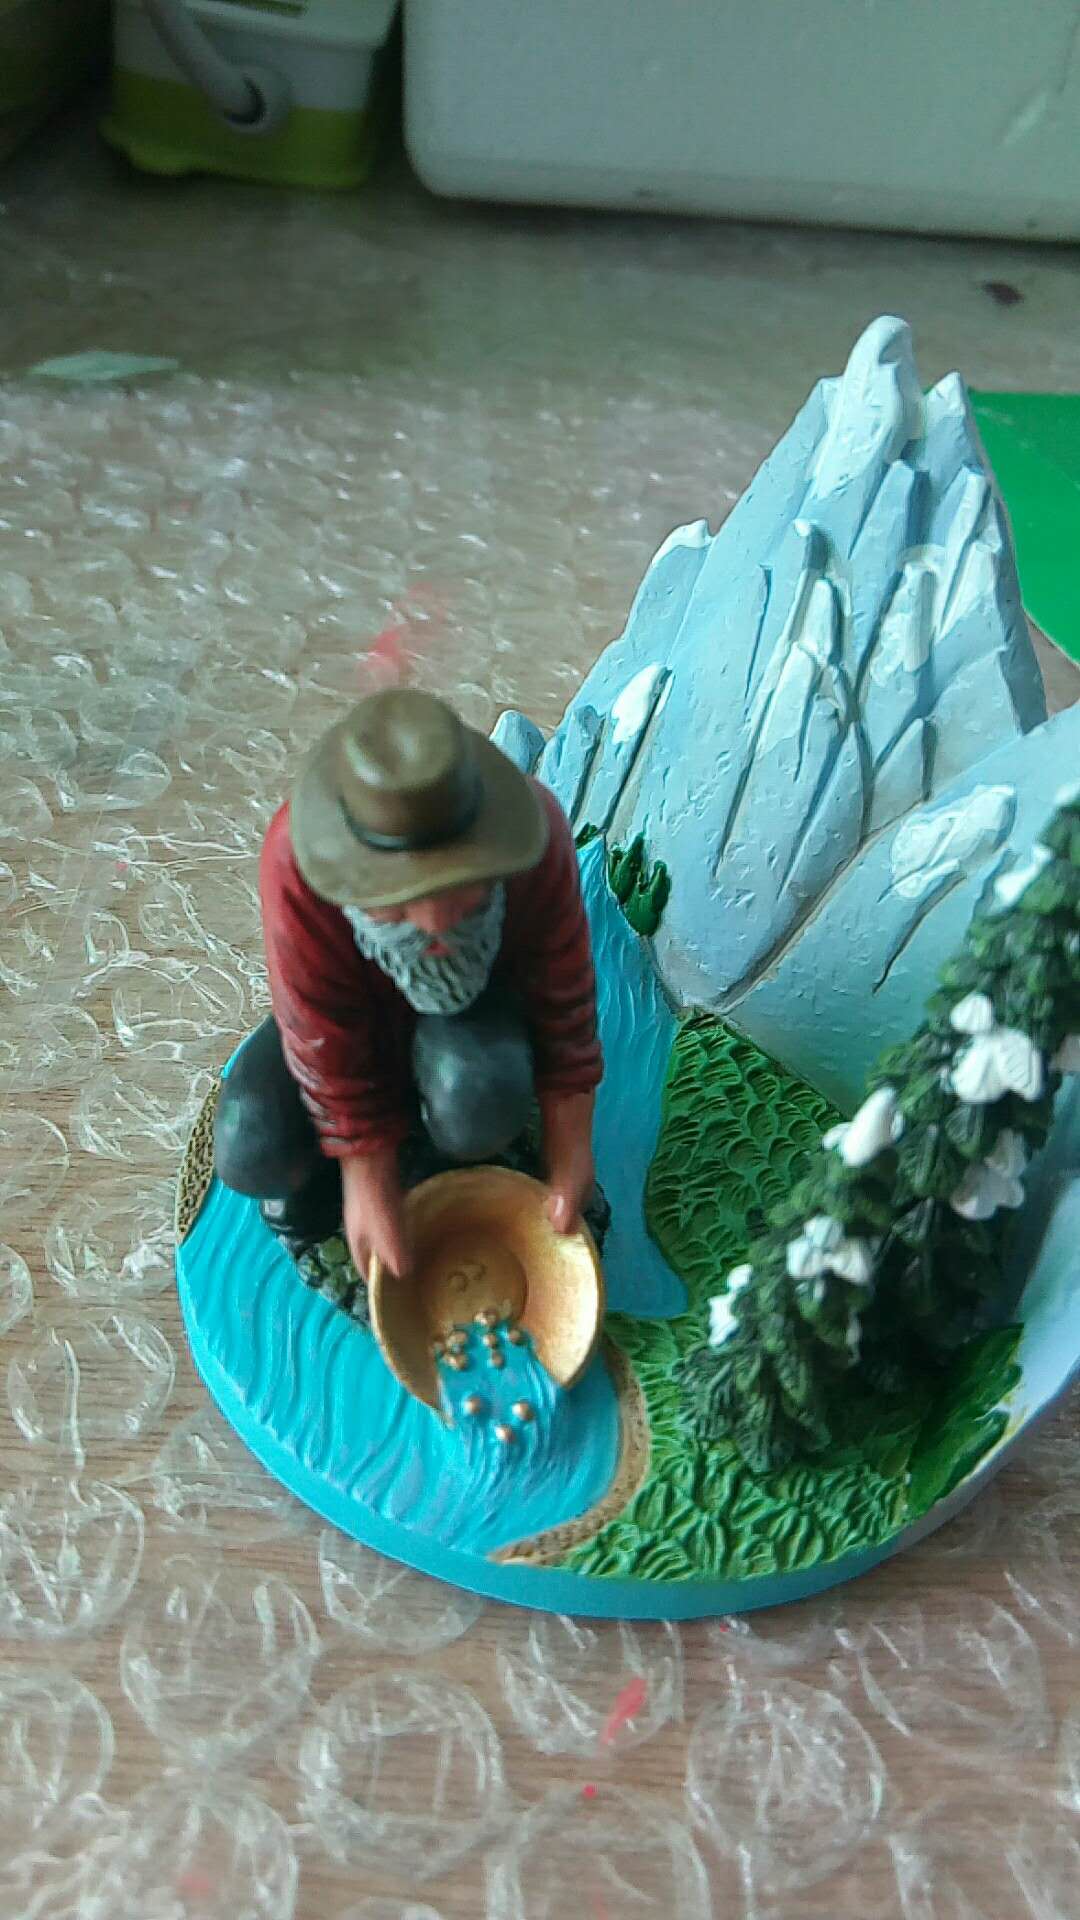
The more traditional method of creating the setting is with hand sculpting. Generally this is my preferred option, as there is a certain charm we can achieve with hand sculpting that lends itself beautifully to snow globes in particular.
After briefing the 2D digital design to my sculptor, he reproduces the concept in 3D using hand sculpted clay. You then have the opportunity to view images like the ones below from every angle, requesting any changes you need prior to sign off and the moulding process.
Step 4 – The Painting Process
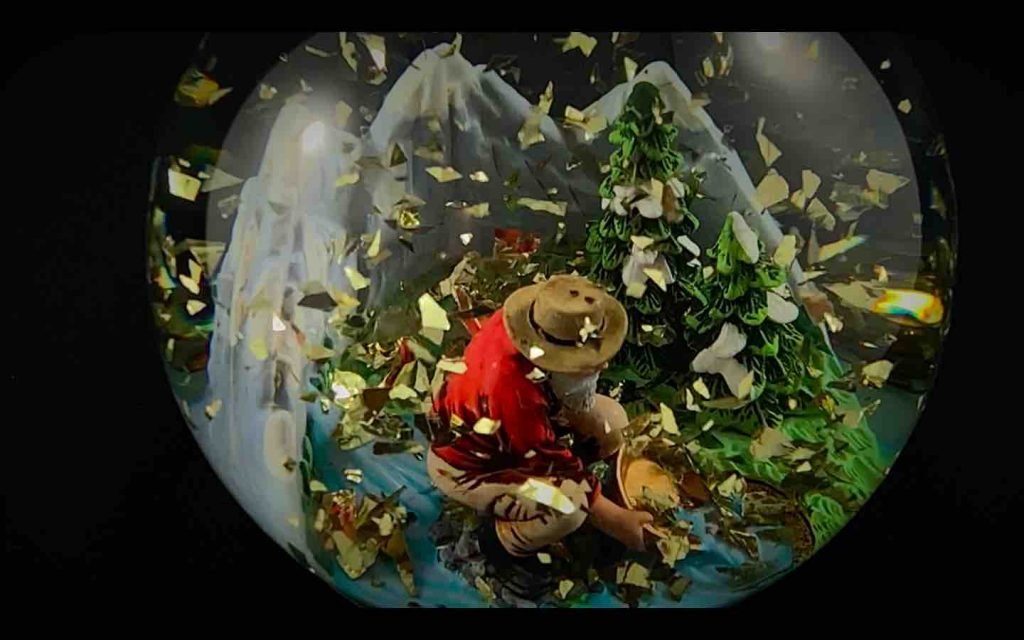
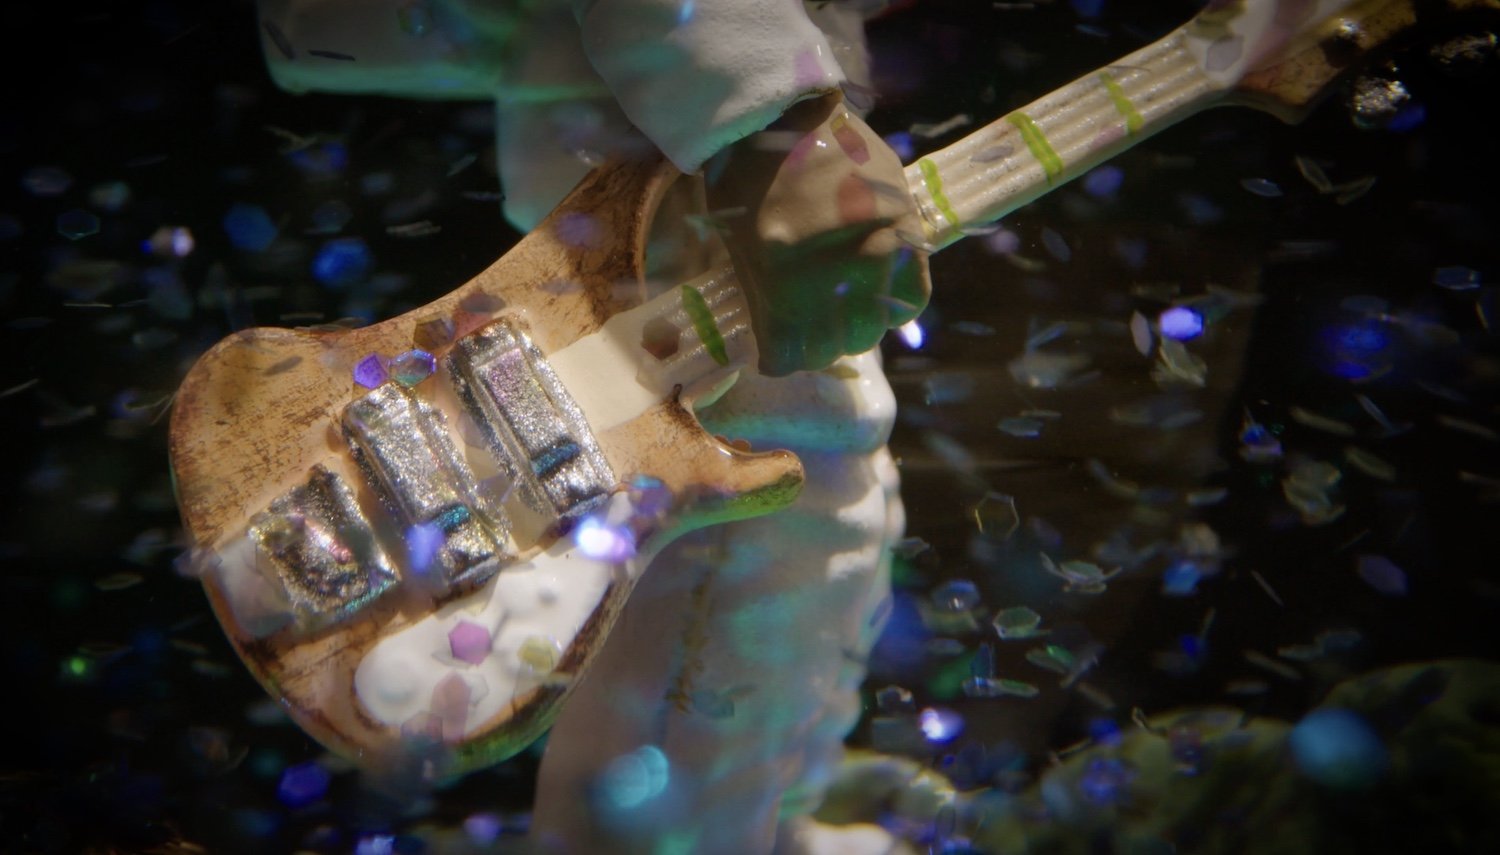
Once the snow globe 3D model is signed off, each individual part of the settings are hand-painted. If there are many small pieces, the setting actually fits together like a jigsaw puzzle, with the tiny elements “plugging into” the setting.
Remembering how small the models are, you can perhaps appreciate the level of detail and workmanship that goes into painting these high quality snow globes perfectly!
Once again, multiple changes to the paint colours are allowed in order to get them perfect. There is never a charge to you for changes, it’s all included in the process.
Again, you’ll receive close up and detailed images of the painted setting from all angles and sides, so you can be confident of the final finish.
Step 5: The Assembly Process
After the painted sculpture is signed off, that’s when we assemble the snow globes with their matching bases, and add decals or assemble with a debosssed or engraved base if required.
You receive final images from all angles of the assembled globe, and at that point, if you would like to receive the sample in hand, we can ship it to you. Once this first sample is signed off, we complete the larger production process over a period of about 1.5 – 2 months, depending on the quantities involved and the time of year.
I’m extremely proud to boast of extra inclusions that nobody else in my field offers. These include:
- Full shipping and delivery insurance world-wide – if anything arrives damaged or not matching the standards we agreed on, I will refund or replace without hesitation. This includes the only “zero air bubble” guarantee in the world!
- Within the USA, ALL duties, taxes and other charges are included in my quoted costs. That means no surprise charges on delivery (a real danger in today’s ever fluctuating world of varying duties, taxes and tariffs).
- The luxury of unlimited changes at each stage of production, at no charge
- Zero hidden or surprise costs. I won’t do that to you.
Once they’re completed, the globes will ship to you via your preferred method of transport (air or sea) and you’ll have them in hand usually about 90-120 days after we’ve started production. I also offer an annual container shipment to my clients in the USA, which allows for highly subsidised and sometimes even zero freight costs. That usually arrives with clients around October each year, with my latest delivery window being November in any given year.
I hope you’ll agree that the process from design to production is impressive – my team and I take great pride in producing custom, high quality snow globes that take the humble globe from kitsch to divine.
Got your own design in mind? Check out more information about my quantity production process and apply for your own custom pieces today.

Kiara Vodehnal
Hello, this is really cool! I was wondering if I could buy just a single snow globe? And how much would it cost? (Hamilton snow globe)
leebsnewadmin
Hi Kiara, thanks for your comment. The Hamilton globes were made for one of my clients. I know they were sold out a while ago, but you may be able to find one on eBay or similar. Good luck! If you want to make your own version, you can always try my DIY tools 😉 Warmly, Leah
Stephen Johnson
Do you do custom “bad taste” snow globes?
royal_support
Hi Stephen, as long as we can sculpt it, we can basically make it. The main limitation is around quantities and production timing. Take a look at my quoting page to get an idea of various options and feel free to request a quote – we can talk more about your idea and what’s possible 🙂